
How to build your own ChatGPT Assistant?
A ChatGPT assistant is an advanced AI tool designed to enhance user interactions by providing intelligent, conversational support across various tasks. These assistants leverage OpenAI's powerful language model, ChatGPT, to deliver a range of capabilities tailored to individual needs. Some of the key features of the assistants are conversational interaction combined with reasoning and content generation. Which brings us to the “Why?”.
Why building a custom GPT?
One of the key pillars of ItsimpleAI is to enable effortless capturing, be to bookmarking a web page or an article to read it later, a text quote or an X post to refer to, a movie or YouTube video to watch later or your own ideas as notes. ChatGPT is a great tool to generate and brainstorm the ideas which happens in a conversational manner. It would be great to capture those ideas once your are happy with the resulting message.
Enter the Itsimple Mate GPT.
The Idea
It’s simple - once you are happy with the ChatGPT’s answer just ask “save it“ and it will save the answer as a note in the ItsimpleAI. That’s it, it’s that simple.
It was sort of a no-brainer and the natural progression path after the introduction of the Itsimple Mate in the ItsimpleAI.
Implementation
Let’s look at the overall conversation flow:
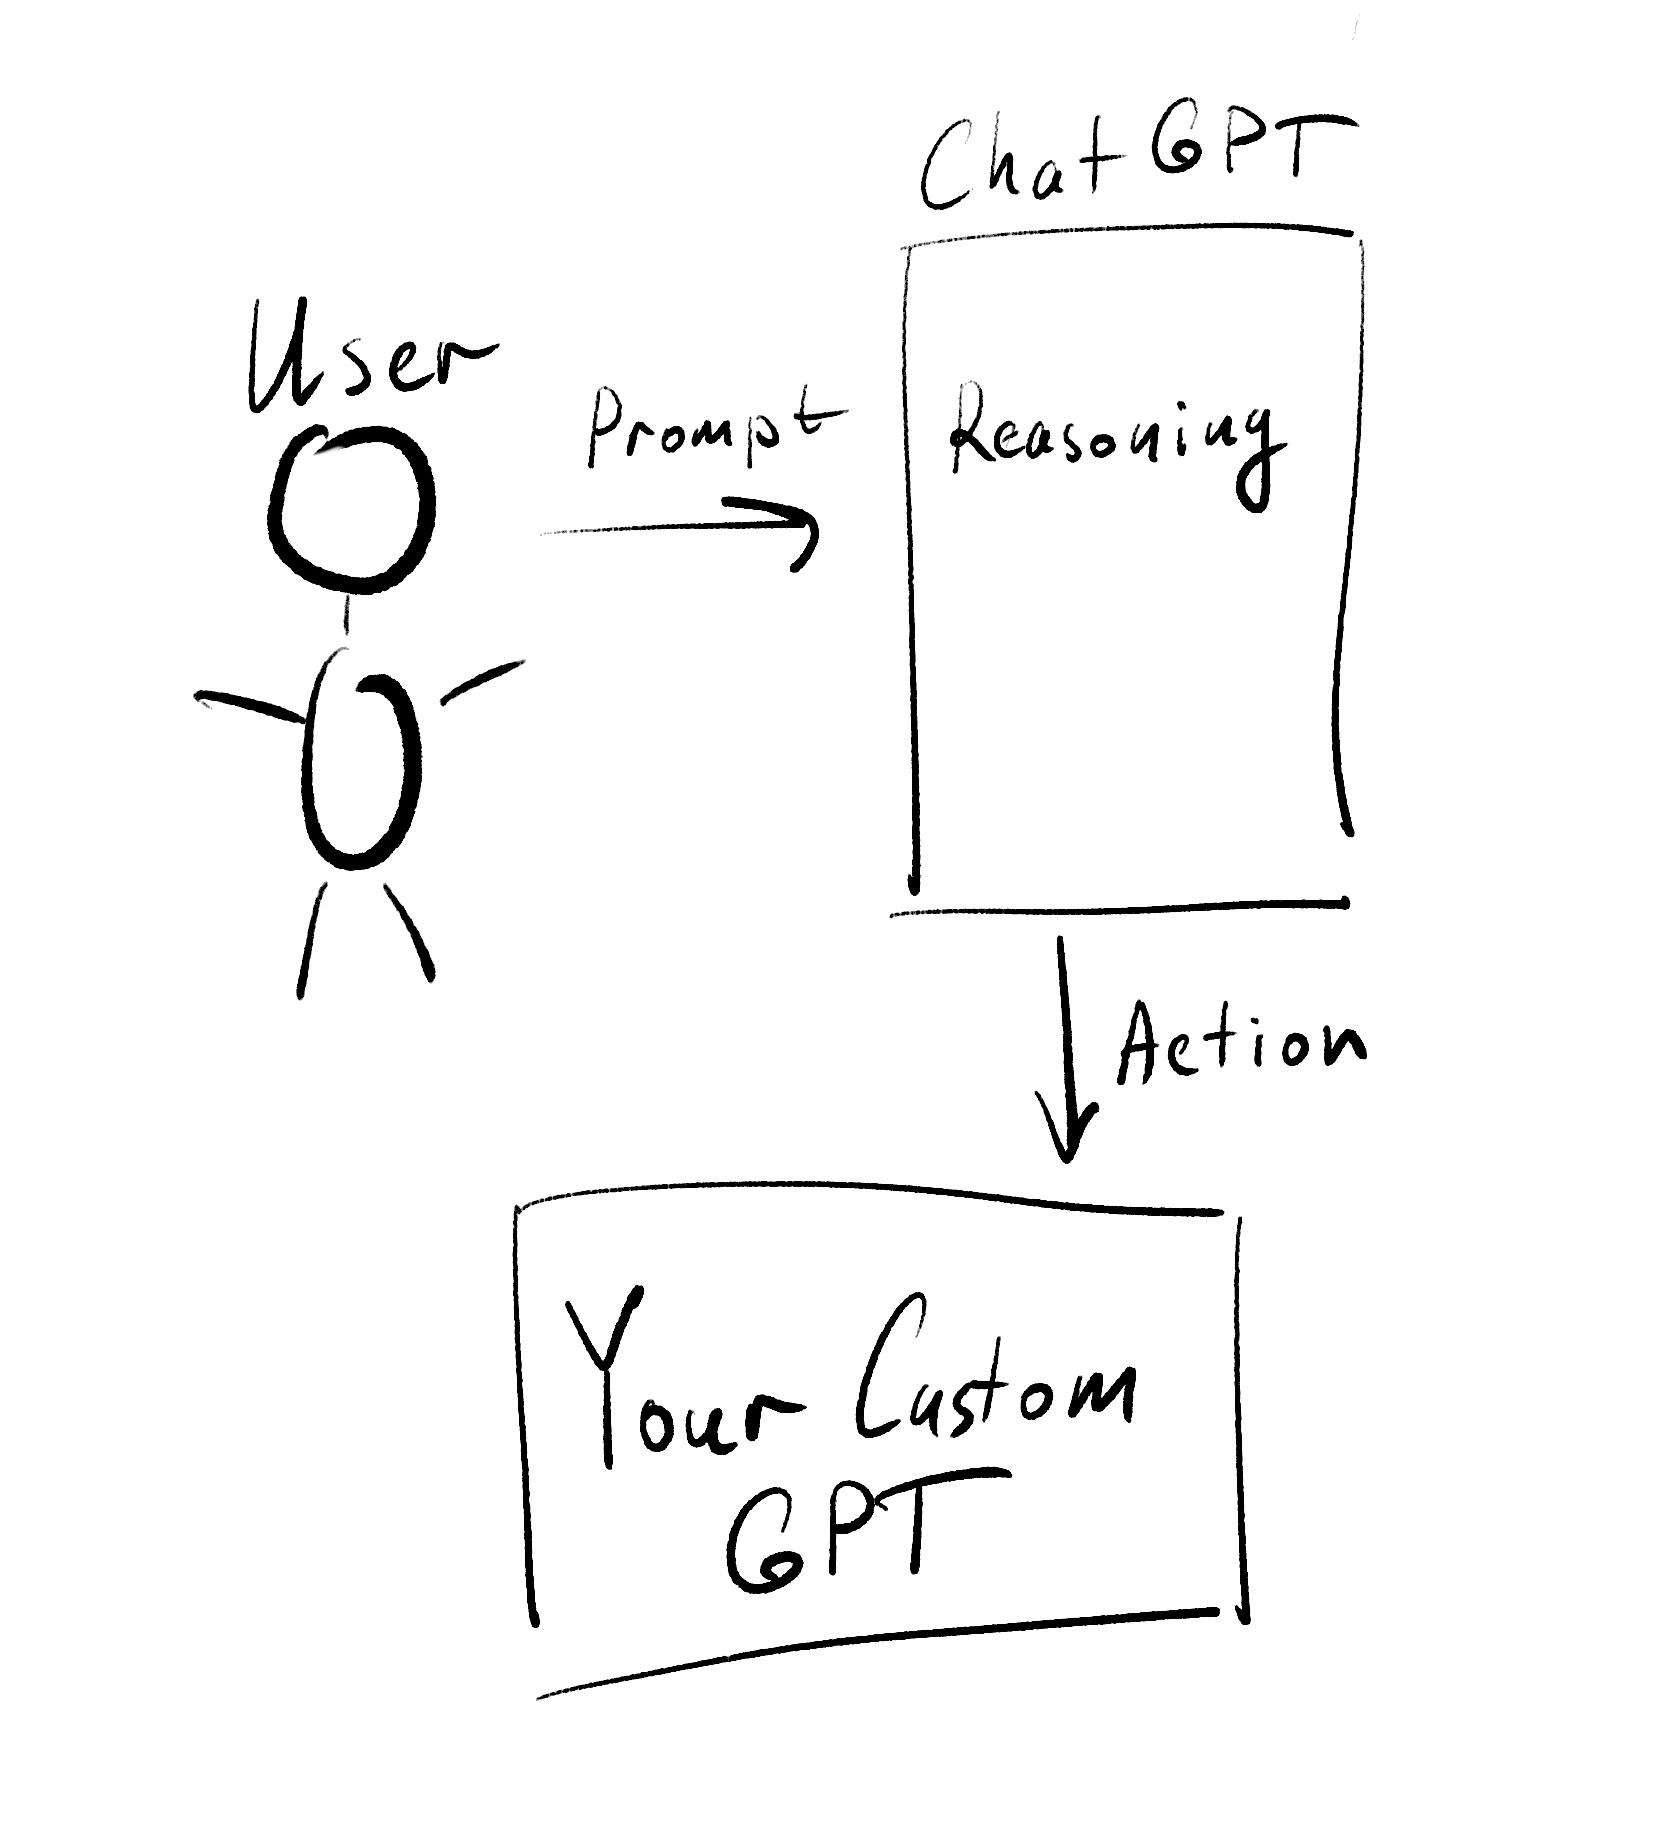
Custom GPTs expose actions in the form of the documented API endpoints, which can be called by the ChatGPT whenever it is asked to perform a task related to an endpoint. Some of the actions can be global and generally available to everyone, for example asking about the current weather in some part of the world, this action doesn’t require user authentication because there is nothing personal about it.
In our case though we’ll need to provide an authentication mechanism in order to know which user should given note belong to.
Authentication
Personally I think that authentication is the trickiest part, so pay attention while you are following along. At the time of writing it, OpenAI’s docs don’t seem to be very helpful on that front, maybe it is just me, but I’ve had to do a lot of trial and error attempts before nailing the whole flow, hopefully documentation will improve over time.
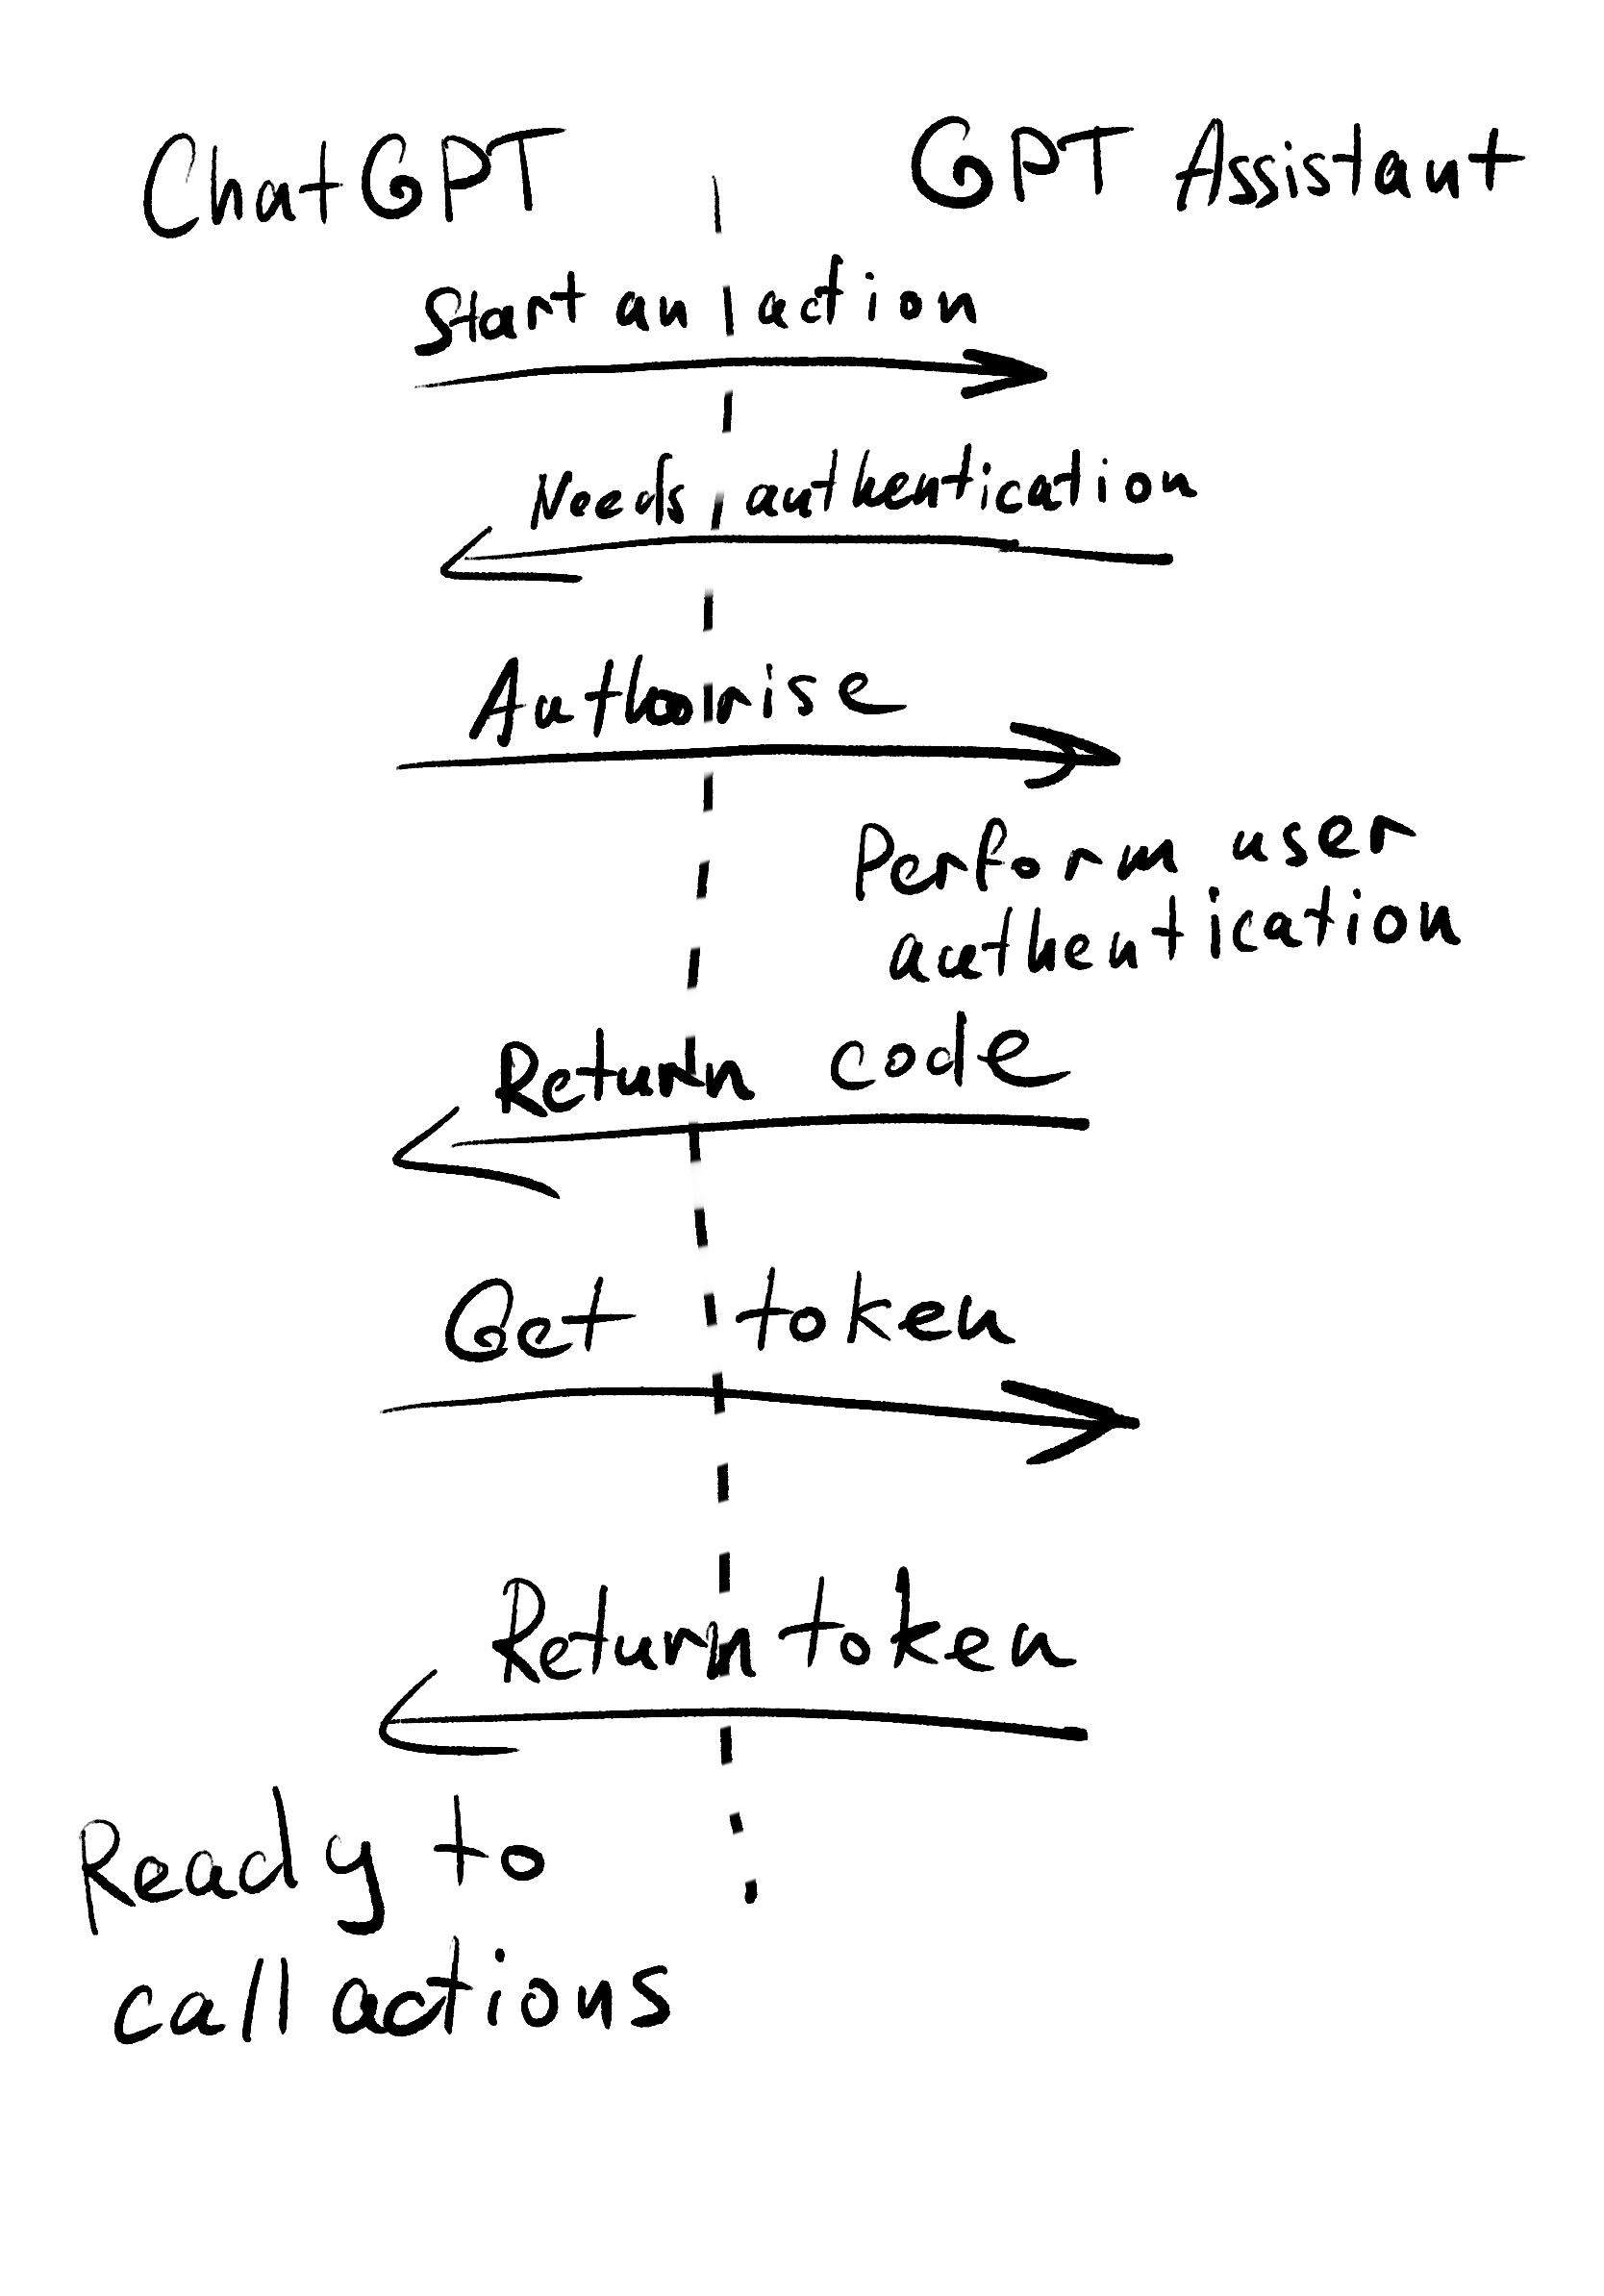
We are going to focus on the OAuth authentication flow, because we’d need to route the notes to every user individually and therefore we’d need to bring user’s identity along the way.
For the OAuth flow you’d need to expose two endpoints:
- Authorization endpoint - authenticates a user.
- Token endpoint - returns user authentication token so that the OpenAI’s client can talk to the endpoints which require authentication by providing
Authentication: Bearer <token>`HTTP header.
You’d need to generate client ID and client secret to serve as OpenAI client’s user ID and password, i.e. OpenAI will use them in requests to your API to identify itself - more on this in here. These client ID and client secret are used when you register you custom GPT in the OpenAI’s configuration.
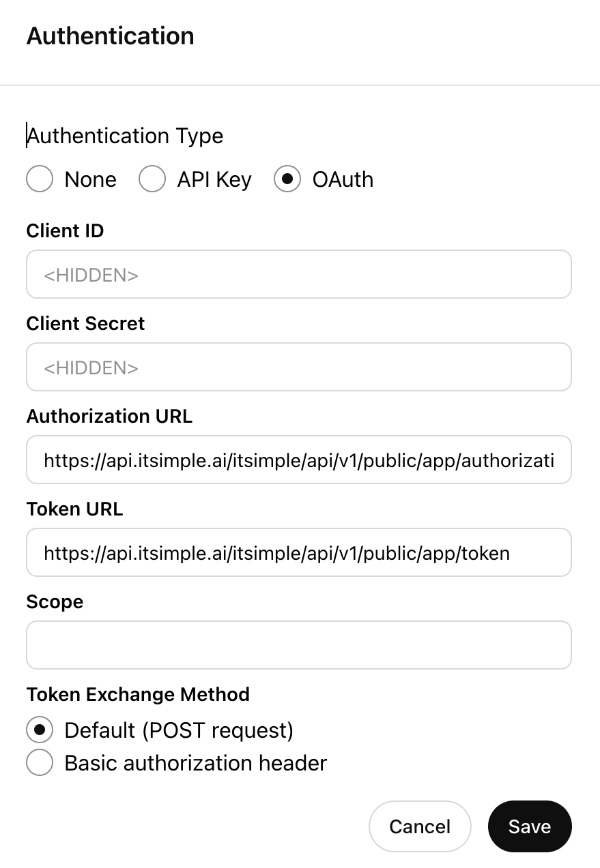
Authorisation endpoint receives HTTP GET request with the following query parameters: response_type=code&client_id=<clientID>&redirect_uri=<oauth_redirect>&state=<state>&scope=<scope>.
Inside of it you’d need to check that the incoming client_id exists and perform user's authentication. You can either use your own built in authentication mechanism or rely on
Google’s,
Apple’s,
Facebook’s or
Amazon’s or other authentication providers.
Also make sure to handle “state” parameter properly,
as in return it back to the OpenAI in the redirect callback (append to the “redirect_uri” value), plus you’d need to append the “code" value to the redirect address too, otherwise OpenAI will complain.
What’s the code? Code is an extra security step making sure that the request is legit and comes from the same authentication flow, also it will be passed down to the token endpoint straight after the redirect.
// GET /authorization
func authorization(w http.ResponseWriter, r *http.Request) *handlers.AppError {
    c := r.Context()

    clientID := r.FormValue("client_id")
    if clientID == "" {
        return handlers.StatusUnauthorized(c, nil, "client ID is required")
    }
    state := r.FormValue("state")
    if state == "" {
        return handlers.StatusUnauthorized(c, nil, "state is required")
    }
    redirectURI := r.FormValue("redirect_uri")
    if redirectURI == "" {
        return handlers.StatusUnauthorized(c, nil, "redirect_uri URI is required")
    }

    // ... check client by the given clientID

    // ... perform user authentication dance

    code := ...generate unique code...

    http.Redirect(w, r, fmt.Sprintf("%s?state=%s&code=%s", redirectURI, state, code), http.StatusFound)
    return nil
}
Token endpoint receives HTTP POST request with the following form value parameters request={'grant_type': 'authorization_code', 'client_id': 'YOUR_CLIENT_ID', 'client_secret': 'YOUR_CLIENT_SECRET', 'code': 'abc123', 'redirect_uri': 'https://chatgpt.com/aip/g-some_gpt_id/oauth/callback'}.
You’d again need to check the client ID, plus the client secret on top of that you are given back the same “code” value as the one generated by you and the redirect URI to check as well.
As a response you’d need to return a Content-Type: application/json with the following body (expiry time is up to you):
    {
        "access_token": "example_token",
        "token_type": "bearer",
        "refresh_token": "example_token",
        "expires_in": 59
      }
// POST /token
func token(w http.ResponseWriter, r *http.Request) *handlers.AppError {
    c := r.Context()

    if r.FormValue("client_id") == "" {
        return handlers.StatusUnauthorized(c, "client ID is required")
    }
    if r.FormValue("client_secret") == "" {
        return handlers.StatusUnauthorized(c, "client secret is required")
    }
    if r.FormValue("code") == "" {
        return handlers.StatusUnauthorized(c, "code secret is required")
    }

    code := ... get code for this session ...
    if r.FormValue("code") != code {
        return handlers.StatusUnauthorized(c, "Unauthorized.")
    }

    clientSecret := ... get hashed client secret for given client ID ...

    if hashSecret(r.FormValue("client_secret")) != clientSecret {
        return handlers.StatusUnauthorized(c, "Unauthorized.")
    }

    authResp := authResponse{
        AccessToken: appClient.AppToken,
        TokenType:   "bearer",
        ExpiresIn:   int(yourTimeOut.Minutes()),
    }
    return handlers.WriteResponse(c, w, authResp)
}
Action(s)
Let’s get back to our value prop, what kind of need is our custom GPT is going to solve? Essentially we are saving messages into notes, therefore it will consistent from a single endpoint for doing exactly that.
This part is actually quite straightforward, OpenAI expects from you an OpenAPI spec to describe your actions (endpoints), so you’d need to provide your spec for them and paste it into the configuration of your custom GPT.
Once it’s all done you should be able to test your GPT live in the playground.
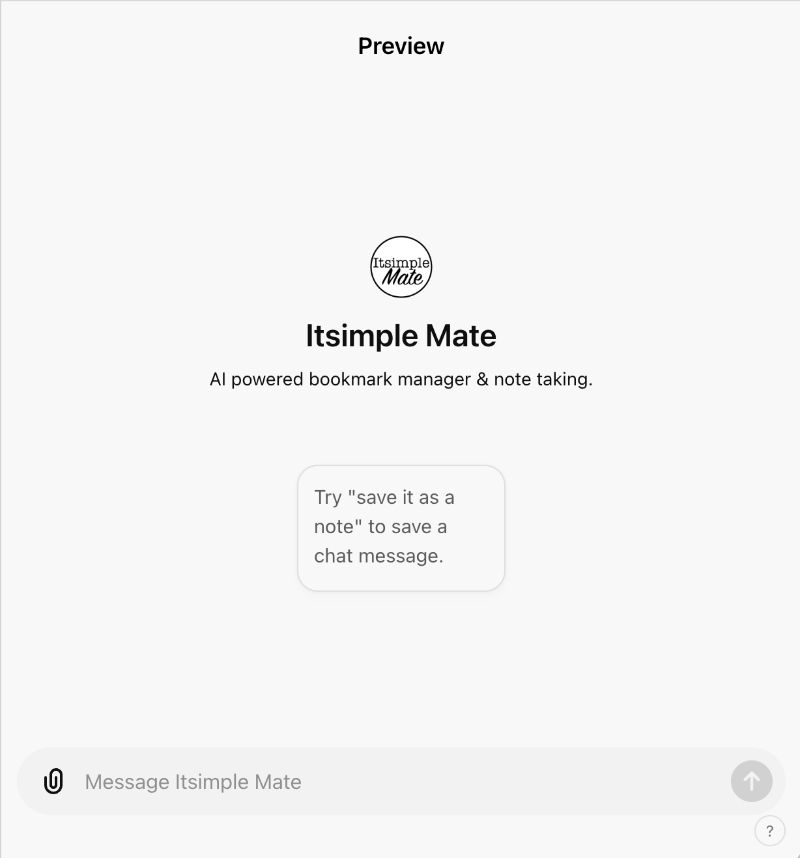
And here is the live demo of the Itsimple Mate in the GPT store.